Some users may experience temporary issues accessing parts of the site. Thanks for your patience.
- Office Hours Mon - Fri 9:00 am – 4:00 pm EST
Welcome to Quick Tips. Today I want to give you some guidance when you are planning an esthetic restoration in the front of the mouth that’s going to involve an implant.
 When we look at these type of cases, the first thing we’ve got to be considering is the precision of that maxillary incisal edge. The second thing we have to think about is once we get that maxillary incisal edge figured out, where that gingival plane is going to be because that is going to be determining the optimum length of the tooth.
 And then from there we have to think about how far that free gingival margin has to be from the head of the implant. Remember the incisal edge to free gingival margin really determines the length of the tooth.
Now we can plan the precise placement of the implant. We have our incisal edge position and we have our free gingival margin. We also know from the biology of implants that if the head of that implant can be about 3 millimeters from our free gingival margin, that gives us the room to be able to shape the tissue, support those papillas and have a great result.
So at the Dawson Academy, if you have an implant we still do everything the same way.
Transcript continued below…
We’re still going to do our full series of photographs, we’re going to do our TMJ occlusal exam, we’re going to get really good, accurate models so we can study the occlusion, and then we can add to the mix a cone beam radiograph to get crystal clear on where this implant is going to need to be placed.
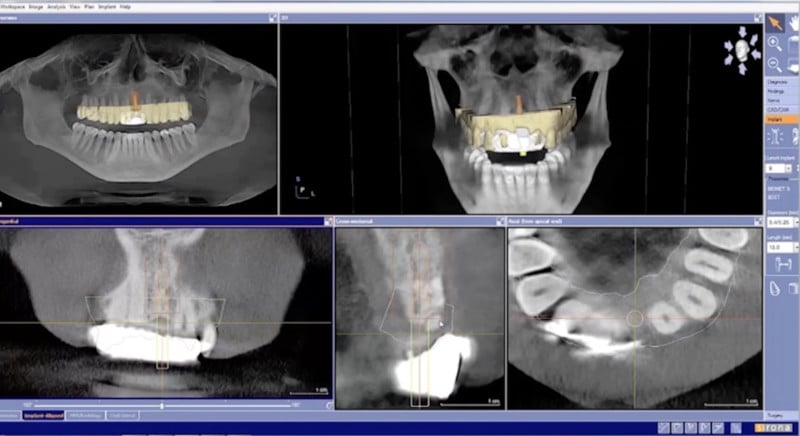 We also have digital technology today that allows us to scan the patient’s mouth. In this case we are actually scanning the preps on the adjacent teeth. We can virtually place the implant, and on this type of data – this happens to be the one from Sirona – making a guide that will go precisely in the patient’s mouth and be able to very, very specifically put the implant not only in the right buccal lingual direction, but also to the specific depth.
So again visualizing incisal edge, visualizing where we want the free gingival margin to be, and making sure we get that implant deep enough so that we’ve got that three millimeter dimension. That becomes very important for what we do, to now four or five months later be able to make a restoration, that is going to be, in this case, screwed in place.
Notice the position of that tooth in relationship to the preps on either side so that now when we complete our try-in appointment here, we can start to see that we’ve got restorations that are going to look life-like, and have all that tissue fill in.
When we’re planning these type of restorations remember this criteria. We must still go through the same visualization that we normally do, but we’ve got to add some components. And the main components is that cone beam x-ray, so that we can go from a incisal edge to free gingival margin, to the specific depth of the implant to be able to get restorations that look like this.
So I hope this has been helpful, and I look forward to seeing you next time on Quick Tips.
ADA CERP is a service of the American Dental Association to assist dental professionals in identifying quality providers of continuing dental education. ADA CERP does not approve or endorse individual courses or instructors, nor does it imply acceptance of credit hours by boards of dentistry.
Concerns or complaints about a CE provider may be directed to the provider or to the Commission for Continuing Education Provider Recognition at ADA.org/CERP.

